

how to fix shower handle
Faucets get a lot of use every day and that's why repairing a faucet is such an important thing to learn how to do. A loose faucet handle can be extremely frustrating because it can sometimes mean that the tap won't turn off correctly. Sometimes these faucets can also squeak, which is very irritating.
If you can repair faucets by yourself, you can save money since you won't need to call the plumber. Repairing a leaky bathroom or kitchen faucet will also save some dough on the water bill. Here are some pointers so you can repair your loose faucet handle.
Step 1 - Turn off the Water
Turning off the water will prevent any water from leaking out when you're working on the plumbing in your house. Make sure that the shut off valve is fully shut off. You can typically find it located below the sink, often in the back of the cabinetry. If your valve is not located beneath the sink, you will need to turn off the master shut off valve in your house. Open the faucet to allow all of the water to flow out. When all the water has been removed, you will be able to work on the plumbing safely with less hassle.
Step 2 - Remove the Handle
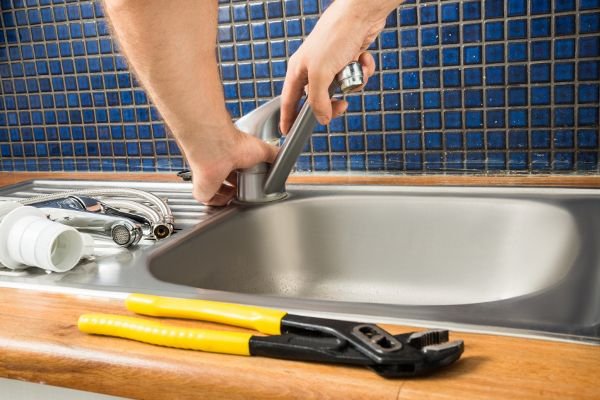
Remove the handle from the faucet. This will be secured with a screw at the top of the handle or at the back. It may be covered by a cover which needs to be carefully removed using a flat-bladed screwdriver. If the handle itself screws in, you may need to use a wrench to remove the handle.
Remember never to take things apart over the sink when you can help it, because if you do then there's a good chance you'll lose a screw down the drain and never find it again. As a precaution, close the drain and place a towel or piece of screen into the sink to catch items that may roll inside.
Step 3 - Check the Washer
While you've opened the tap it's a good time to take a look at the state of the washer. If the washer is damaged or is too brittle, you should take this out and replace it with one of the same type. It's always a good idea to replace the washer even if it looks okay. If you're sure it's fine, you can lubricate it with some plumber's putty to ensure that it works properly. While the inner parts are exposed, look for excessive wear around all of the metal parts. Old and well-used faucet handles can chip or break, which will keep the handle from tightening properly.
Step 4 - Reassemble

Now you need to reassemble the faucet and put it all back together. Put the washer back into the stem and assemble everything the same way that it came apart. Tighten everything up to ensure that the handle is nice and tight, but do this carefully so that you don't risk scratching or damaging the handle of the faucet.
Step 5 - Test
Test the handle to ensure that there are no leaks and that the handle no longer moves loosely. If it does, you will need to do some more troubleshooting. It could also be that the handle is so badly damaged that the entire faucet will need replacing.
how to fix shower handle
Source: https://www.doityourself.com/stry/repairing-a-faucet-how-to-fix-a-loose-handle
Posted by: winshipforre1939.blogspot.com
0 Response to "how to fix shower handle"
Post a Comment